Basic Tees
 Super Hero
 Printed T-Shirts
 Superheroes Full Sleeves
 Men’s Tank Tops
 Super Hoodies
 Super Sweatshirts
 Jogger Pants / Bottoms
 The Super Shorts
There’s something deeply satisfying about wearing a t-shirt that nobody else owns — one that carries your idea, your humor, or your art. That’s exactly why DIY T-Shirt Design has become one of the most popular creative hobbies (and small business ideas) in recent years. Whether you’re designing a quirky quote for yourself, making matching tees for a family trip, or testing the waters of a custom apparel brand, learning to design a t-shirt at home is easier than you think — and a lot more fun.
In this guide, we’re breaking down everything you need: the right t-shirt design tools, the most practical t-shirt design techniques, and a few insider tips that’ll help your designs actually survive the washing machine. By the end, you’ll know exactly how to turn a blank tee into something that feels personal, professional, and genuinely wearable.
🎨 Why DIY T-Shirt Design Is Trending Right Now
Custom apparel isn’t just a niche hobby anymore — it’s a full-blown movement. A few reasons this trend keeps growing:
- Affordability — Designing at home costs far less than ordering small-batch custom prints.
- Personal expression — People want clothing that reflects their identity, not mass-produced slogans.
- Gifting culture — Handmade tees make memorable, budget-friendly gifts.
- Side hustle potential — Many DIY designers turn their hobby into an Etsy shop or small apparel brand.
- Accessible tools — Cutting machines, design software, and transfer papers are more affordable and beginner-friendly than ever.
If you’re new to this, starting with a solid blank canvas matters more than people realize. Grabbing a few plain tees from a basic tees collection gives you a clean, high-quality base to experiment on without worrying about fabric quality issues ruining your design later.
🧰 Essential Tools for DIY T-Shirt Design
Before diving into techniques, let’s talk gear. Having the right t-shirt design tools saves you time, money, and a whole lot of frustration.
1. Design Software Tools
Your design starts on a screen before it ever touches fabric. Popular t-shirt design software options include:
- Canva — Beginner-friendly, drag-and-drop, great for text-based or simple graphic designs.
- Adobe Illustrator — Industry-standard for vector art; ideal if you want crisp, scalable designs.
- Adobe Photoshop — Best for photo-based or highly detailed artwork.
- Cricut Design Space / Silhouette Studio — Specifically built to pair with cutting machines.
2. Cutting & Printing Machines
- Cricut or Silhouette machine — Cuts vinyl designs with precision; a must-have if you’re serious about HTV projects.
- Vinyl cutting machine — Similar function, often used for bulk or commercial-scale cutting.
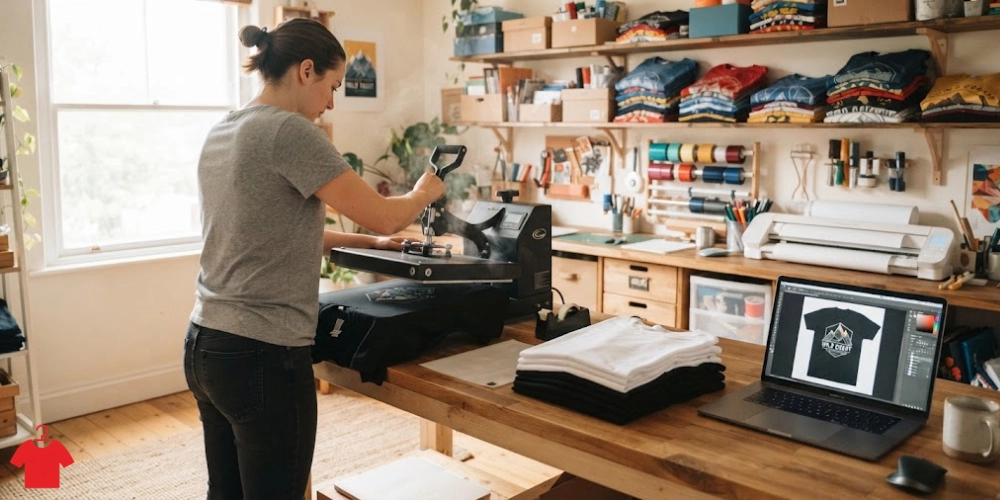
- T-shirt printing machine — Includes heat presses used for transferring designs permanently onto fabric.
3. Manual Tools & Supplies
Not every great design needs electronics. Some of the most charming DIY tees come from simple supplies:
- Fabric markers and fabric paint
- Stencils (store-bought or handmade with freezer paper)
- Iron and ironing board (for iron-on transfers)
- Rubber gloves, dye, and rubber bands (for tie-dye projects)
- T-shirt transfer paper
- Embroidery hoops, needles, and thread
Having these on hand means you’re ready to try almost any technique without waiting on a shipment.
✂️ Top T-Shirt Design Techniques You Can Try at Home
This is where the fun really begins. Let’s go through the most popular t-shirt design techniques, from beginner-friendly to slightly more advanced.
Heat Transfer Vinyl (HTV)
HTV is one of the most popular methods for DIY designers because it’s clean, durable, and allows for sharp, bold designs.
- Design your artwork in Cricut Design Space or Silhouette Studio
- Cut the design on colored vinyl sheets using your vinyl cutting machine
- Weed out the excess material
- Use a heat press (or household iron) to apply the design onto the shirt
Best for: Text-based designs, logos, and bold graphics.
Screen Printing at Home
Screen printing at home takes a little more setup but delivers a professional, long-lasting finish — especially great for bulk orders or small business runs.
- Create a stencil using a screen and emulsion
- Apply fabric ink using a squeegee
- Cure the print with heat to set the ink permanently
Best for: Single or multi-color designs printed in larger quantities.
Sublimation Printing
Sublimation printing uses heat to turn ink into gas, which then bonds with polyester fabric fibers — resulting in vibrant, long-lasting, and fully wash-safe designs.
- Print your design on sublimation paper using sublimation ink
- Place it on a polyester shirt
- Apply heat and pressure using a heat press
Best for: All-over prints, photo-realistic designs, and vibrant color work.
Iron-On Transfers
One of the simplest entry points into DIY printing. Iron-on transfers let you print a design onto special transfer paper and then iron it directly onto the fabric.
- Print your design (mirrored, if using an inkjet transfer paper)
- Place it face-down on the shirt
- Apply heat with an iron for the recommended time
Best for: Beginners experimenting with their first few designs.
Stencil & Freezer Paper Technique
This old-school method remains a favorite for its simplicity and charm.
- Print or draw your design onto freezer paper
- Cut it out carefully with a craft knife
- Iron the shiny side onto the shirt to create a temporary stencil
- Paint over it with fabric paint, then peel off the paper once dry
Best for: Hand-crafted, artsy designs with a slightly textured finish.
Tie-Dye & Bleach Dye Techniques
These techniques are less about precision and more about creative chaos — in the best way.
- Tie-dye uses rubber bands and fabric dye to create colorful patterns
- Bleach dye uses diluted bleach on dark-colored shirts to create faded, artistic patterns
Best for: Statement pieces, festival wear, and casual streetwear vibes.
Hand-Painted & Fabric Marker Designs
Sometimes the most personal designs come straight from your hand — literally.
- Sketch lightly with a fabric-safe pencil
- Fill in using fabric paint or fabric markers
- Let it dry fully before heat-setting with an iron (on the reverse side)
Best for: One-of-a-kind, artistic pieces and gifts.
Embroidery on T-Shirts
Adding texture and a premium feel, embroidery on t-shirts has made a strong comeback in custom apparel design.
- Hoop the fabric to keep it taut
- Stitch your design by hand or with an embroidery machine
- Secure threads on the inside to prevent unraveling
Best for: Small logos, monograms, and elevated, boutique-style designs.
🪄 Step-by-Step Guide: How to Design a T-Shirt at Home
If you want a clear, beginner-friendly roadmap, here’s how the whole process typically flows:
- Choose your concept — A quote, graphic, logo, or illustration.
- Pick your technique — Based on your tools, budget, and desired finish.
- Create or source your design — Using design software or hand-drawn art.
- Prepare your materials — Vinyl, transfer paper, stencils, or paint.
- Select your blank shirt — Fabric type matters; cotton works best for most techniques.
- Apply your design — Following the specific method’s steps.
- Cure or set the design — Heat-press, iron, or air-dry as required.
- Wash-test — Always test wash before wearing or gifting to confirm durability.
This simple sequence applies whether you’re making one shirt or prepping a small batch for friends.
🖨️ DIY T-Shirt Printing vs Professional Printing
A common question beginners ask: should I just order from a professional printer instead?
| Factor | DIY Printing | Professional Printing |
|---|---|---|
| Cost (single shirt) | Lower upfront, but tools add cost | Higher per-shirt cost, no tool investment |
| Quality consistency | Varies with skill level | Highly consistent |
| Customization freedom | Full creative control | Limited by provider’s options |
| Bulk orders | Time-consuming | Faster turnaround |
| Best for | Hobbyists, gifts, small batches | Businesses, bulk events, branding |
If you ever want a flawless finish without the trial-and-error, browsing a ready-made printed t-shirts collection is a great way to compare professional results against your own DIY attempts — and get inspired for your next project.
💡 Custom T-Shirt Design Ideas to Inspire You
Still staring at a blank screen wondering what to design? Here are some reliable custom t-shirt design ideas:
- Minimalist typography with a meaningful quote
- Retro-inspired graphic art
- Pop-culture or superhero-themed designs — check out superhero tees for visual inspiration
- Matching family or friend-group designs
- Nature-inspired illustrations (mountains, waves, florals)
- Abstract patterns using tie-dye or bleach techniques
- Monogrammed or embroidered initials
- Year-specific or milestone designs — similar to yearly tees themes
- Full-sleeve graphic designs for a bolder look, like these full-sleeve superhero tees
- Cozy, graphic-printed hoodies for colder seasons — browse super hoodies for layout ideas
🧵 Best Practices for Long-Lasting DIY Designs
A beautiful design is only half the job — durability is what makes it worth the effort.
- Always wash fabric before designing to remove sizing agents
- Use heat-resistant tape to keep transfers from shifting
- Turn shirts inside out when washing to protect the print
- Avoid high dryer heat — air-dry when possible
- Test small design samples before committing to a full batch
- Store vinyl and transfer paper flat to prevent warping
⚠️ Common Mistakes Beginners Make (and How to Avoid Them)
Even experienced crafters mess these up occasionally — but now you won’t have to.
- Skipping the mirror step when printing iron-on transfers (text ends up backward)
- Using too much heat, which can scorch fabric or vinyl
- Choosing the wrong fabric type — stretchy blends don’t always hold HTV well
- Rushing the curing process, leading to peeling after the first wash
- Overcomplicating the first project — start simple, then build complexity
✅ Final Thoughts
DIY T-Shirt Design is one of those hobbies that rewards patience with genuine creative satisfaction. Once you understand the core t-shirt design tools and techniques — from HTV and sublimation to stencils and embroidery — you’ll find yourself experimenting more confidently with every project. The learning curve is gentle, the tools are accessible, and the results feel personal in a way store-bought clothing simply can’t match.
Start small, pick one technique that excites you, and build your skills from there. Before long, you’ll have a wardrobe (or maybe even a small business) filled with designs that are entirely your own.
Ready to start your first project? Grab a high-quality blank tee from our shop and bring your design ideas to life today.
❓ Frequently Asked Questions
1. What is the easiest DIY t-shirt design technique for beginners? Iron-on transfers and stencil designs are the most beginner-friendly since they require minimal equipment and a short learning curve.
2. Do I need a Cricut machine to start DIY t-shirt design? Not necessarily. While a Cricut or Silhouette machine makes vinyl cutting precise, techniques like stencils, hand-painting, and tie-dye require no machine at all.
3. What fabric works best for DIY t-shirt printing? 100% cotton tees generally hold designs best, especially for HTV, screen printing, and fabric paint techniques.
4. How long do DIY t-shirt designs last? With proper curing and care (cold wash, inside-out, air-dry), most designs last as long as the shirt itself — often 50+ washes.
5. Is sublimation printing better than heat transfer vinyl? It depends on your fabric and design type. Sublimation works best on polyester for vibrant, all-over prints, while HTV is more versatile across fabric types for bold, simple graphics.
6. Can I start a t-shirt business using DIY techniques? Absolutely. Many small apparel brands begin exactly this way — starting with HTV or screen printing at home before scaling to professional production.