Basic Tees
 Super Hero
 Printed T-Shirts
 Superheroes Full Sleeves
 Men’s Tank Tops
 Super Hoodies
 Super Sweatshirts
 Jogger Pants / Bottoms
 The Super Shorts
If you’ve ever admired a crisp, professional-looking logo stitched onto a baseball cap and wondered how it’s done, you’re in the right place. Custom cap embroidery is one of the most rewarding skills a hobbyist, small business owner, or aspiring entrepreneur can learn — and it’s far more approachable than most beginners assume. Whether you’re trying to personalize a gift, build a side hustle, or add premium branding to promotional merchandise, this guide walks you through everything from the right tools to the exact stitching process, so you can go from “complete beginner” to “confidently finishing your first cap” by the end of this tutorial.
Let’s unpack this step by step.
🧵 What Is Custom Cap Embroidery (and Why It Still Beats Printing)
Custom cap embroidery is the process of stitching a design, logo, or text directly into the fabric of a cap using thread, rather than printing it on the surface. Unlike heat transfers or screen printing, embroidery creates a textured, raised design that’s physically woven into the material.
Here’s why so many brands and crafters prefer embroidery over printing:
- Durability — stitched designs survive washing, sun exposure, and daily wear far better than printed ink.
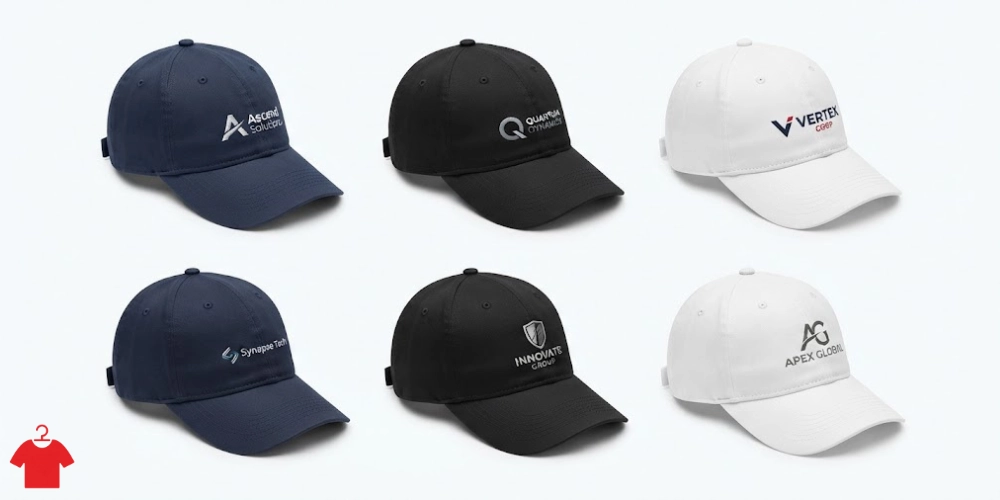
- Premium look — embroidery instantly signals higher quality, which is why most corporate and promotional caps use it.
- Versatility — works on structured caps, trucker hats, snapbacks, and even curved panels where printing often struggles.
If you’re building a brand around custom embroidered caps, this durability factor alone is often the deciding reason customers choose embroidery over printed alternatives.
🧢 Understanding Cap Structure Before You Start Stitching
Before touching a needle, you need to understand what you’re actually stitching on. A cap isn’t just one flat piece of fabric — it has distinct zones, and each one behaves differently under a machine.
Panels, Crown, and Bill Explained
- Front panel — the most common embroidery zone; relatively flat and ideal for logos.
- Crown — the curved top section; trickier due to seams and curvature.
- Bill (visor) — rarely embroidered directly but sometimes used for small text or accents.
- Side panels — great for smaller monograms or side logos.
Design Placement on Cap
Getting placement wrong is one of the fastest ways to ruin an otherwise perfect design. As a rule of thumb:
- Center the design slightly above the curve of the front panel, not dead center of the whole cap.
- Keep designs under 2.5–3 inches wide for front panels to avoid distortion from the curvature.
- For side panel designs, keep them small — think monogram caps rather than large logos.
🧰 Essential Embroidery Supplies List You’ll Need
Every solid tutorial starts with the right toolkit. Here’s your essential embroidery supplies list before you begin any project:
- Embroidery machine (single-needle or multi-needle, depending on volume)
- Cap frame / cap driver — a specialized hoop designed to hold the curved shape of a cap
- Stabilizer for caps — typically a heavier cut-away stabilizer since caps need extra support
- Needles — sized appropriately for the fabric (more on this below)
- Thread colors — polyester or rayon embroidery thread for shine and durability
- Bobbin thread — lighter weight thread used underneath the design
Best Embroidery Machine for Caps
If you’re serious about scaling this into a business, look for machines with a dedicated cap-driver attachment — this is non-negotiable for consistent results. Entry-level single-needle machines work fine for hobbyists, but multi-needle machines dramatically speed up production once you’re taking bulk orders.
🪡 Cap Embroidery Techniques You Should Know
Once your supplies are sorted, it’s time to understand the actual stitching techniques that separate amateur results from professional-looking embroidered hats.
Stitch Types: Satin, Fill, and Running Stitch
- Satin stitch — used for text, outlines, and borders; creates a smooth, glossy finish.
- Fill stitch — used for larger solid areas like logos or bold shapes.
- Running stitch — thin, simple lines often used for fine detailing or underlay.
Flat Embroidery vs 3D Puff Embroidery
- Flat embroidery sits level with the fabric and works well for detailed, multi-color logos.
- 3D puff embroidery uses foam underneath the stitching to create a raised, bold effect — commonly seen on sports caps and streetwear brands.
Understanding when to use each technique is a core part of mastering cap embroidery techniques, since the wrong choice can make a clean design look messy or oversized.
💻 Digitizing Your Design: The Secret Behind Clean Embroidery
Here’s something most beginners don’t realize: you can’t just load a JPEG into an embroidery machine. Designs need to be digitized — converted into a stitch file the machine can read, with defined stitch types, directions, and density.
- Popular embroidery software includes Wilcom and Hatch, both industry standards for digitizing.
- Digitizing is especially critical for logo embroidery and monogram caps, where precision directly affects brand perception.
- If you’re not ready to learn digitizing yourself, many digitizers offer affordable per-design pricing — a smart shortcut for beginners.
📝 Step-by-Step Guide for Cap Embroidery (The Complete Tutorial)
Now for the part you’ve been waiting for — the actual cap embroidery step by step process.
- Digitize or source your design file in the correct format for your machine (.DST, .PES, etc.).
- Attach the cap frame/driver to your machine and secure the stabilizer inside it.
- Stretch the cap onto the frame, making sure the front panel sits flat and centered under the needle area.
- Load your design into the machine and align it using the on-screen or laser guide.
- Thread the machine with your chosen thread colors and load the bobbin thread.
- Run a test stitch on a scrap piece of similar fabric to check tension and alignment.
- Start the embroidery run, monitoring thread breaks or puckering as it stitches.
- Remove the stabilizer backing carefully once stitching is complete.
- Trim excess threads and inspect the design for any loose stitches.
- Press lightly if needed to flatten any fabric distortion from the hooping process.
Following this sequence consistently is the fastest way to go from beginner cap embroidery to producing retail-ready results.
⚙️ Machine Settings That Make or Break Your Embroidery
Even with the right technique, poor machine settings for cap embroidery can ruin an otherwise great design.
- Thread tension — too tight causes puckering; too loose causes loose, sloppy stitches. Always test on scrap fabric first.
- Needle size for caps — a size 75/11 or 80/12 ballpoint needle generally works well for structured cap fabric, though denser materials may need a sharper point needle.
- Stitch density — higher density looks richer but can cause caps to feel stiff or distort thinner fabrics.
⚠️ Common Mistakes in Cap Embroidery (and How to Avoid Them)
Even experienced crafters run into these issues occasionally — but beginners hit them constantly:
- Skipping the cap frame and trying to hoop a cap like flat fabric — this almost always leads to shifting and misalignment.
- Using the wrong stabilizer weight, resulting in puckered or warped designs.
- Ignoring the curvature of the crown when placing designs, causing visual distortion.
- Ignoring thread tension tests, which leads to thread breaks mid-run.
- Overcrowding small panels with overly detailed designs that lose clarity at smaller sizes.
Avoiding these mistakes early will save you significant time, thread, and frustration as you scale your skills.
💰 Cost of Custom Cap Embroidery: What to Expect
The cost of custom cap embroidery varies based on a few key factors:
- Design complexity — more colors and stitch count increase price.
- Digitizing fees — typically a one-time charge per unique design.
- Order volume — bulk orders significantly reduce per-unit cost.
- Cap quality — premium blanks naturally cost more than basic caps.
For small businesses, understanding these cost drivers helps when pricing promotional caps embroidery for corporate or event orders.
🧢 Popular Cap Styles for Embroidery
Not all caps behave the same way under the needle. Here’s how popular styles compare:
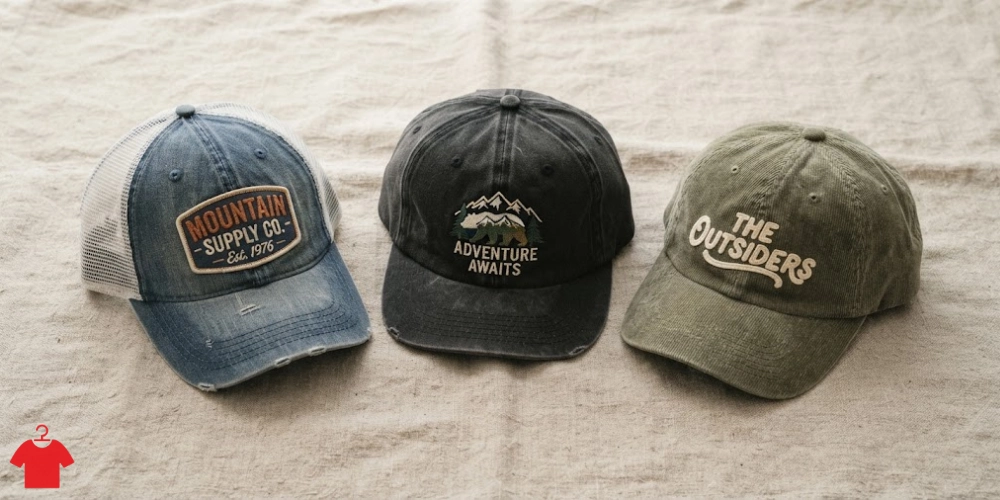
- Baseball cap embroidery — the most common and beginner-friendly structure, with a classic curved front panel.
- Snapback cap embroidery — typically flatter at the front, allowing for slightly larger logo placements.
- Trucker hat embroidery — mesh-back caps require extra care with stabilizer placement to avoid snagging the mesh.
If you’re ready to apply these techniques to real caps, Printees’ full product collection is a great place to explore cap-ready blanks and complementary custom apparel.
🚀 Turning Your Skill Into a Business: Custom Hats Business Ideas
Once you’re comfortable with the fundamentals, custom cap embroidery opens the door to genuine business opportunities:
- Corporate branding — embroidered caps for staff uniforms or client gifts.
- Event merchandise — custom caps for weddings, sports teams, or community events.
- E-commerce brand drops — pairing embroidered caps with matching apparel for a cohesive brand identity.
Speaking of cohesive branding, pairing your embroidered caps with matching streetwear is a smart move. Many successful cap brands sell them alongside items like custom printed t-shirts or cozy fleece hoodies to create a complete, bundled look that increases average order value.
👕 Pairing Your Embroidered Caps with the Right Apparel
A well-embroidered cap looks even better styled with the right outfit. If you’re building a merch line or personal wardrobe around your custom caps, consider pairing them with:
- Everyday basic tees for a clean, minimal look
- Statement printed t-shirts for bolder styling
- Layered ultra-soft hoodies for cooler weather drops
This kind of thoughtful pairing is exactly how small embroidery projects evolve into recognizable, sellable brands.
🏁 Conclusion
Custom cap embroidery might look intimidating at first glance, but as you’ve seen throughout this tutorial, it comes down to understanding your materials, mastering a handful of core techniques, and practicing consistently. From choosing the right embroidery machine and stabilizer to nailing your digitizing and stitch settings, every step builds toward one goal: clean, professional, long-lasting designs that people genuinely want to wear.
Whether you’re embroidering your first monogram cap as a hobby or planning to launch a full promotional caps business, the fundamentals in this guide will serve you at every stage.
Ready to put these techniques into practice? Explore Printees’ shop for high-quality blanks and apparel to pair with your next embroidery project, and start turning your custom cap ideas into reality today.
❓ Frequently Asked Questions
1. What is the best embroidery machine for caps? Multi-needle machines with a dedicated cap-driver attachment are considered best for consistent, professional results, though single-needle machines work well for hobbyists starting out.
2. How much does custom cap embroidery cost? Pricing depends on design complexity, digitizing fees, cap quality, and order volume — bulk orders typically reduce the per-unit cost significantly.
3. Can beginners learn cap embroidery easily? Yes. With the right supplies — a cap frame, proper stabilizer, and a digitized design — beginners can produce clean results by carefully following a step-by-step process and testing settings before full runs.
4. What’s the difference between flat and 3D puff embroidery? Flat embroidery sits level with the fabric and suits detailed logos, while 3D puff embroidery uses foam underneath for a raised, bold effect often seen on sports caps.
5. What stabilizer should I use for cap embroidery? A heavier cut-away stabilizer is generally recommended for caps, since it provides the extra support needed for the curved, structured fabric.
6. Do I need special software to digitize cap designs? Yes, software like Wilcom or Hatch is commonly used to convert artwork into stitch files that embroidery machines can read accurately.